There are many tutorials on rebuilding Linux Software RAID but most are unnecessarily overly complicated. It’s fairly straight forward – here’s how.
Unlike hardware RAID, software RAID is all handled by the operating system itself. This means the process of replication, rebuilding and control is performed by the filesystem with various kernel and userspace software.
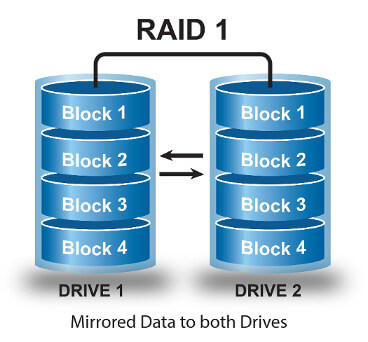
This example is for RADI 1 (basic mirror) but the principle applies to any level. For this scenario we are replacing a hard drive which is failing a SMART test but hasn’t actually failed yet.
We can see that Raw_Read_Error is increasing so decide to swap out the disk before it completely fails.
Oct 24 03:50:56 peanut smartd[6294]: Device: /dev/sdb [SAT], SMART Prefailure Attribute: 1 Raw_Read_Error_Rate changed from 118 to 119
The device in question is /dev/sdb which is usually the second SATA port. Before replacing the drive lets take a dump of its current partition layout.
root@peanut:~# fdisk -l /dev/sdb

Disk /dev/sdb: 1000.2 GB, 1000204886016 bytes
255 heads, 63 sectors/track, 121601 cylinders, total 1953525168 sectors
Units = sectors of 1 * 512 = 512 bytes
Sector size (logical/physical): 512 bytes / 4096 bytes
I/O size (minimum/optimal): 4096 bytes / 4096 bytes
Disk identifier: 0x1e43cc3b

   Device Boot      Start         End      Blocks   Id  System
/dev/sdb1            2048    19531775     9764864   fd  Linux RAID autodetect
/dev/sdb2   *    19531776  1953525167   966996696   fd  Linux RAID autodetect
This is important as we need to configure the same layout on our disk. First shut down the machine cleanly and then replace the physical disk.
Power it back on and we should now have a degraded array (or arrays), which is expected. You can check this by looking at /proc/mdstat
root@peanut:~# cat /proc/mdstat

md0 : active raid1 sdb1[2] sda1[0]
      9763768 blocks super 1.2 [2/1] [U_]

md1 : active raid1 sdb2[2] sda2[0]
      9763768 blocks super 1.2 [2/1] [U_]
Notice that ‘[U_]’ means md0 has two members, only one of which is up.
Lets mirror the partition layout of our new drive to match that of the old one.
A quick way of doing this is to use ‘sfdisk’, which can dump and recreate an identical structure with a one liner:
root@peanut:~# sfdisk -d /dev/sda | sfdisk /dev/sdb
Alternatively, using ‘fidsk’ create the exact same layout – importantly selecting ‘fd’ as the type (this is the hex code for Linux RAID autodetect) – press ‘t’ to change the type after adding the partition. Also toggle the ‘boot’ flag so everything is identical.
root@peanut:~# fdisk -l /dev/sdb

Disk /dev/sdb: 1000.2 GB, 1000204886016 bytes
255 heads, 63 sectors/track, 121601 cylinders, total 1953525168 sectors
Units = sectors of 1 * 512 = 512 bytes
Sector size (logical/physical): 512 bytes / 4096 bytes
I/O size (minimum/optimal): 4096 bytes / 4096 bytes
Disk identifier: 0x1e43cc3b

   Device Boot      Start         End      Blocks   Id  System
/dev/sdb1            2048    19531775     9764864   fd  Linux RAID autodetect
/dev/sdb2   *    19531776  1953525167   966996696   fd  Linux RAID autodetect
That looks perfect. Because RAID metadata is held on disk as opposed to on a hardware controller we need to tell MD that we have added a new disk to the array.
root@peanut:~# mdadm -a /dev/md0 /dev/sdb1
mdadm: added /dev/sdb1
Rinse and repeat for the second and third arrays as required.
Lastly, lets reinstall GRUB so the new disk can also boot if required.
root@peanut:~# grub-install /dev/sdb

Installation finished. No error reported.
All looking good. We can make sure the rebuild is happening and get a rough ETA for the resync task from mdstat again.
root@peanut:~# cat /proc/mdstat
Personalities : [linear] [multipath] [raid0] [raid1] [raid6] [raid5] [raid4] [raid10]
md1 : active raid1 sdb2[2] sda2[0]
      966994808 blocks super 1.2 [2/1] [U_]
      [===========>.........]  recovery = 58.1% (561963328/966994808) finish=306.8min speed=22001K/sec

md0 : active raid1 sdb1[2] sda1[0]
      9763768 blocks super 1.2 [2/1] [U_]
      	resync=DELAYED

unused devices:
We can see here that md1 is rebuilding and has an ETA of ~300 minutes. There are various parameters you can tweak to limit I/O etc if the rebuild is affecting a production workload.
You can also see that md0 is in a resync state of ‘DELAYED’. This is because it shares the same physical disks as md1 and it makes no sense to resync two arrays at half the speed (except for the fact that md0 is a fraction of the size, but whatever).
Once the array has rebuilt you will see the second starts.
root@peanut:~# cat /proc/mdstat
Personalities : [linear] [multipath] [raid0] [raid1] [raid6] [raid5] [raid4] [raid10]
md1 : active raid1 sdb2[2] sda2[0]
      966994808 blocks super 1.2 [2/2] [UU]

md0 : active raid1 sdb1[2] sda1[0]
      9763768 blocks super 1.2 [2/1] [U_]
      [=>...................]  recovery =  8.2% (809472/9763768) finish=2.3min speed=62267K/sec

unused devices:
Note the first array now shows ‘[UU]’ which means it has two members and they are both in an optimal state.
You can monitor mdstat and syslog for any messages. For example:
Oct 24 14:02:40 peanut kernel: [  837.542257] md: recovery of RAID array md1
Oct 24 14:02:40 peanut kernel: [  837.542259] md: minimum _guaranteed_  speed: 1000 KB/sec/disk.
Oct 24 14:02:40 peanut kernel: [  837.542261] md: using maximum available idle IO bandwidth (but not more than 200000 KB/sec) for recovery.
Oct 24 14:02:40 peanut kernel: [  837.542264] md: using 128k window, over a total of 966994808k.
Syslog will also output info when the rebuild is complete. Similar to this:
[33269.050020] RAID1 conf printout:
[33269.050025]  --- wd:2 rd:2
[33269.050029]  disk 0, wo:0, o:1, dev:sda2
[33269.050032]  disk 1, wo:0, o:1, dev:sdb2
[33424.043679] md: md0: recovery done.
[33424.111474] RAID1 conf printout:
[33424.111479]  --- wd:2 rd:2
[33424.111483]  disk 0, wo:0, o:1, dev:sda1
[33424.111486]  disk 1, wo:0, o:1, dev:sdb1
That’s all there really is to it. Of course with RAID 1 you should have really been running with a hot spare as until the rebuild is complete the first disk is a single point of failure but that’s for another article 🙂
Have fun!